Tuesday, January 30, 2018

Unicorn Magic in a Shaker


My niece's birthday is in early February so I decided to make her a card using the Magical Day Clear-Mount Bundle from the Stampin' Up! 2018 Occasions Catalog.
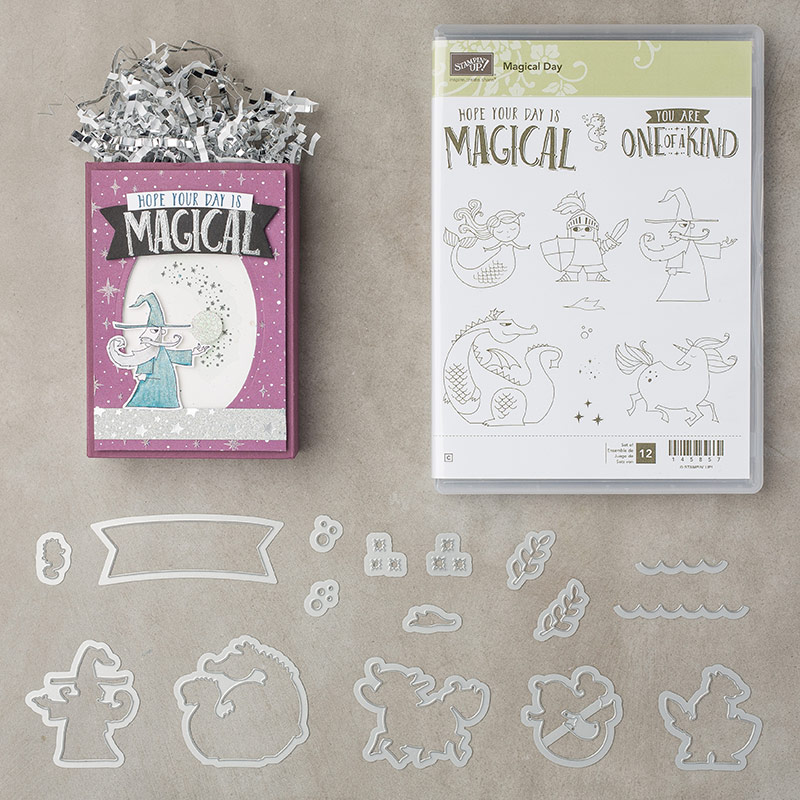

Magical Day Clear-Mount Bundle

I decided to make a shaker card using the Irridescent Sequins Assortment.  I love these colors and decided to use them in the card.  I stamped the unicorn onto whisper white cardstock and then colored in the mane and tail with Stampin' Write markers in Calypso Coral, Pool Party, So Saffron, Pear Pizzazz, Pool Party, Powder Pink, and So Saffron.  Then I covered the mane and tail with Wink of Stella to give it a little sparkle.  I decided to fussy cut the unicorn since my color was a little messy (and I needed some scissor therapy).  Otherwise, I would have used the matching thinlit!


For the greeting I stamped part of the greeting onto the card base and then stamped the "MAGICAL" part onto Pool Party Cardstock using Versamark and heat embossed with silver embossing powder.  I added some mini sequin trim and some Powder Pink ribbon threads (pulled out of the Powder Pink 3/8" shimmer ribbon) beghind the greeting for some flare.


The oval was die-cut using the largest oval from the Stitched Shapes Framelits Dies. 


 I had a bit of a hard time with assembling this card.  The first time I adhered the top of the card to the card base I ended up with a spare piece of cardstock in the window with the sequins.  I had to disassemble the card and re-add the foam adhesive strips around the oval.  The second time I adhered the top of the card to the base I complete forgot to add the sequins.  UGH!  So, had to disassemble the card yet again.  This time I remembered the sequins, without any stray garbage lying around.  Guess I need to clean my desk off!  Luckily I was able to keep the top part of the card and just replace the base each time.
Whew.  The card is in the mail and should arrive in plenty of time for her birthday!

Happy day and hope the card inspired you (and the experience I had did not scare you).  I love the shaker cards and they aren't too hard to make at all, as long as you pay attention.

Sunday, January 28, 2018

Valentines Ensemble

A quick post to share something I was able to work on this weekend.  With school and work, I treasure the time I get to make cards.  I actually find I need to make cards in order to keep my sanity.  Of course, time is not that hard ti find as it seems as I do spend an AWFUL amount of time on Facebook  and Pinterest, mostly watching what other Stampin' Up! demonstrators are able to create with their talents.

Inspired by so many talented people out there, I decided to focus on some Valentine's for my sweetie.  We don't really celebrate Valentine's Day in a huge manner, although my husband usually makes an effort to get a card, flowers and a treat.  His efforts make me feel guilty since we always say "don't do anything", so I don't and he does.  This year I decided to up my game since I have been traveling so much and distracted with many things.

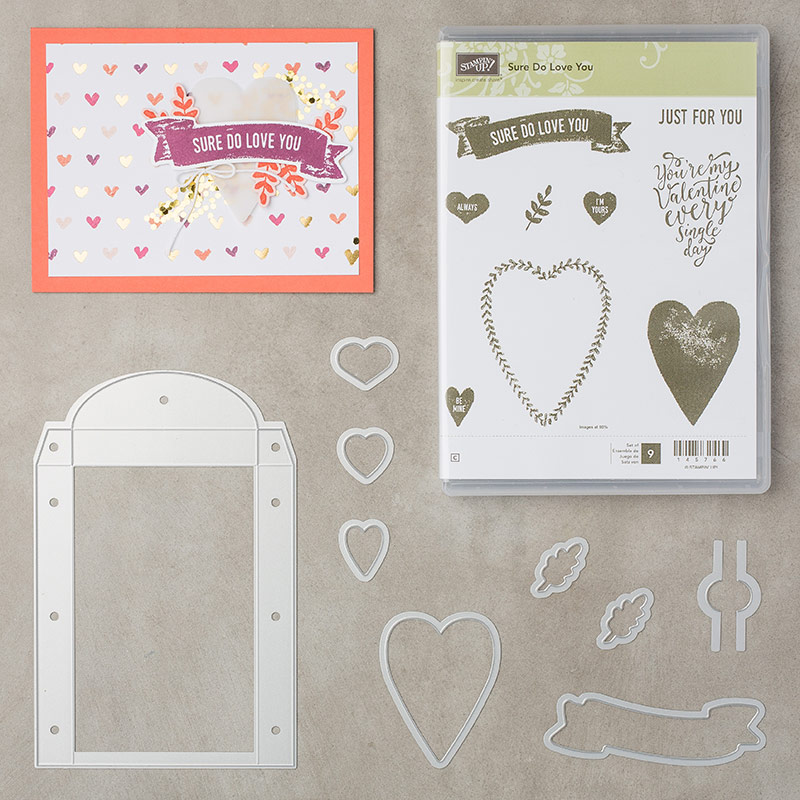
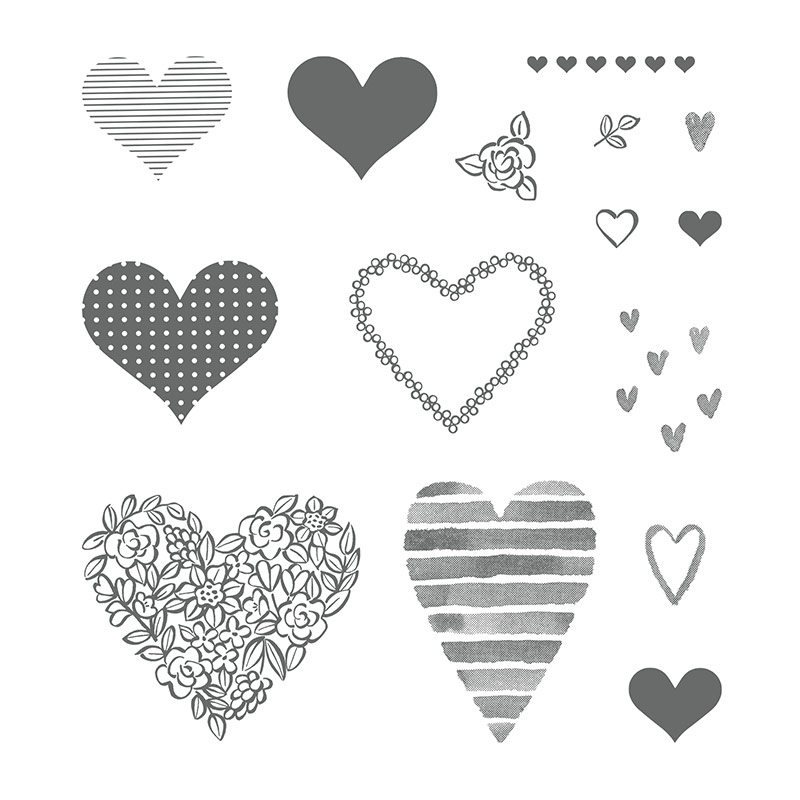
I purchased the Sure Do Love You Clear-Mount bundle as well as the Heart Happiness Photopolymer Stamp Set from the Stampin' Up! 2018 Occasions Catalog and wanted to make something with these sets.

 Sure Do Love You Clear-Mount Bundle

Heart Happiness Photopolymer Stamp Set

I ended up with a cute treat box (which I will fill with his favorite, Reese's Peanut Butter cups) and a matching card.


I used a color combination of Powder Pink, Flirty Flamingo and Berry Burst.  I colored some Shimmery White Embossing Paste with ink from the Berry Burst and Powder Pink reinkers and used the small hearts from the Mini Treat Bags thinlits dies (Stampin' Up! 2017-2018 Annual Catalog) as the template.  

The "Love You greeting is from the Bloomin' Love Photopolymer Stamp Set (Stampin' Up! 2017-2018 Annual Catalog).  


Can't wait to surprise him with these items!

Happy days to you all!

Sunday, August 20, 2017

Paper Craft Anniversary

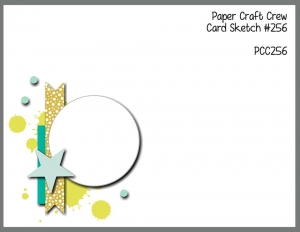
I needed an anniversary card for my husband's parents so I used the Paper Craft Crew Challenge (PCC256) for this week for some inspiration.

Paper Craft Crew Card Sketch Challenge 256. Come play along! #papercraftcrew #stampinup #sunnygirlscraps #papercrafting #papercrafts #stamping #stamps #papercraft #rubberstamp #rubberstamps #artsandcrafts #hobby #crafts #craftastherapy #createeveryday #happymail #snailmail #creativelifehappylife #handmadeisbetter #craftsposure #creativemess #christiancreative #becreative #instagood #crafters #diy #smallbusiness #cardmaking #cardmaker #washitape www.papercraftcrew.com www.sunnycraftcrew.com

I pretty much stayed close to the sketch, with a few substitutions.  All supplies I used came from the Stampin' Up! 2017-2018 Annual Catalog.  


The color combination is Peakaboo Peach, Soft Sky, Gold and Whisper White.

Instead of the splatter I decided to try to use a watercolor technique to add the color to the card.  For this technique I pressed the Peakaboo Peach stamp pad onto ziploc bag, spritzed it with water and then dabbed the edge of a piece of whisper white cardstock into the ink.  I only made a small spot so that the ink didn't cover too much of the paper.  I love the various watercolor techniques out there so I continue to practice and try new ways to get the watercolor effect.

I used one of the Eastern Gold Vinyl Stickers for the background and Soft Sky 3/8" Classic Weave Ribbon which I folded to create a ruffled effect.

The greeting is from the Beautiful Bouqet photopolymer stamp set inked with Basic Black and stamped onto WHisper White cardstock.  I punched it with the 1-3/4" circle punch.  I punched another 1-3/4" circle from gold foil cardstock and glued it behind the greeting.

The heart was die cut from Wood Texture Designer Series Paper Stack using the heart from the Wood Crate framelit die.

And finally, I added a few Metallic Enamel Shapes gold dots.

The card came together pretty nicely and it is already in the mail (will be late since their anniversary is tomorrow).

Hope you enjoyed the card!

Sunday, August 13, 2017

Tomorrow is a gift

A super quick post!  I made some goody bags for a colleague at work who retired.  He was a very sweet man and I hope he gets to enjoy his family (and super cute grandkids) as much as possible!


I used the Playful Backgrounds stamps to add some fun images a white paper bag (purchased on amazon).  The color combination is Tangerine Tango, Daper Denim, Tempting Turquoise and Lemon Lime Twist.

The chair and greeting is from the Colorful Seasons Photopolymer Bundle.

All products are from the Stampin' Up! 2017-2018 Annual Catalog.

Enjoy your today and tomorrow!

Friday, August 11, 2017

Cotton Balls and Birthdays

Hey all, I am so excited to show you a card I created.  It was inspired by the newer farmhouse style decorations and various pics I saw during my quick stress relieving moments on Pinterest.  Here was one of the inspirations for my card.  I am loving the cottonball stems!!  

Farmhouse grapevine cotton boll wreath with by Twentycoatswreath

Since Stampin' Up! has the mason jar stamp set and dies I decided to build my card using the mason jar die and the new Beautiful Bouquet Photopolymer stamp set in the Stampin' Up! 2017-2018 Annual Catalog.  Here's the card!


I just love how this turned out.  I was so giddy when things started falling together (after a sleepless night when my mind started whirring with ideas).

A few tips for how I made the card.

The cotton ball stems were made using the whisper white mini pom-pom trim (recently retired from Stampin' Up!) and the stems and the 5-petal flower bunch die from the Bouquet Bunch framelit dies.  I die cut both the stems and the flowers using Early Espresso cardstock.  I cut the flowers out individually and trimmed them a little so the petals were thinner.  I curled the petals using my fingers and so they cupped a pom-pom, then I glued the cupped flower to the white pom-pom using Tombow glue.   You can kind of tell in the pic below that I used various widths of the flower petals, I didn't need to cut them uniformly.


The leaves were also die cut from the same Bouquet Bunch framelit dies.  For the long leaves I die cut them using  Pear Pizzazz cardstock and then I sponged some Emerald Envy ink on all but the top part of the leaf to give it a dual color effect.  The other leaves were die cut using Wild Wasabi and Garden Green.  

The mason jar was die cut from vellum cardstock and I tinted it by sponging it with Soft Sky ink.

The background was made using the new Pinewood Planks Dynamic Textured Impressions Embossing Folder.  I used this folder to emboss a piece of Whisper White cardstock.  Then I used an aquapainter to add some Sahara Sand ink to the pine to give the wood the darker white-washed color.

The rooster is from the Wood Words clear-mount bundle (Stamp and coordinating die) and the sentiment is from Happy Birthday Gorgeous photopolymer stamp set.

Everything except the whisper white pom-pom trim is from the Stampin' Up! 2018-2018 Annual Catalog.  I am glad I was able to use so many different products to make this card.  It's nice when I can tell my husband that I am using the things I buy ;0).

Since the card met a few sketch challenges I added my card to the following challenges:

Paper Craft Crew Challenge PCC255

SU! Only Challenges SUO Challenge #180 - Happy Birthday

Hope you enjoy the card!

Thursday, August 10, 2017

Freshly Made Birthday

A quick post today to showcase a card I made for Freshly Made Sketches #300.


I actually made a different card and decided to change it up so it fit the challenge better.  All supplies are from the Stampin' Up! 2017-2018 Annual Catalog.  I started with a Crumb Cake card base and stamped the flowers from Touches of Texture stamp set.  I colored the flowers in with the white gel pen and the leaves with pear pizzazz stampin' marker.  Then I die cut the bird from the Birds & Blooms Thinlits Dies from Pool Party cardstock.  I used my aqua painted and Tranquil Tide ink pad to add some contrasting color to the bird.  


Then I stamped a greeting from the Best Birds Photopolymer Stamp Set using Early Espresso ink onto Whisper White cardstock.  I die cut the circle using Stitched Shapes Framelits Dies and then mounted it to a punched 2" circle from Tranquil Tide cardstock.  I cut the side off a length of Tranquil Tide 1/2" finely woven ribbon and pulled a few strands of the thread out and mounted it on the back of the circles using glue dots.  I added some mini silver sequin trim as well for a little bling.


Here is the original card I did as well.  The greeting came from the Ribbon of Courage stamp set and I used both Pear Pizzazz and Old Olive markers on the leaves for some contrast.  Otherwise, everything else is the same.


Enjoy!


Thursday, July 27, 2017

A Fresh Birthday Card

I have been wanting to use the new embossing paste in the Stampin' Up! 2017-2018 Annual Catalog. I love the 3-D effect the paste adds to the card.  For my first attempt I decided to go with the natural look, white.  I know you can use a reinker and color the paste.  I like the monochrome effect of the white on white though so I started with there.  


I die cut the rhombus shapes from the Eclectic Layers Thinlits and used that as a stencil.  Once the paste dried I cut out some flowers and leaves using the same Eclectic Layers thinlit set.  The flower uses Fresh Fig (one of the new 20017-2018 In Colors from Stampin Up!) and Perfect Plum.  

The greeting is from the Better Together wood mount stamp set.  I love this set as it gives a great variety of greetings to cover various occasions.  I used the Stitched Shapes Framelits die to cut the greeting out and added some mini silver sequin trim as well as some whisper white and fresh fig 1/8" sheer ribbon.

Hope you enjoyed the card!